​Create a Survey

(back to Site Owner Help)

Ensure the Team Collaboration Lists Feature is activated

survey1.JPG 

Go to Site contents > add an app

survey2.JPG 

Find the survey app and click

survey3.JPG 

Name your survey and click Create

survey4.JPG 

Add questions to your survey (Settings > Add Questions)

survey5.JPG 

survey6.JPG 

You can continue with additional questions

survey7.JPG 

Until you are finished.

survey8.JPG 

At this point you may be totally happy with the survey and it’s ready to go…however there may be a few things you want to do from here.  Go Settings > Survey Settings

survey9.JPG 

Branching Logic

Branching enables you to do some simple conditional testing of an answer.  For example, if you ask ‘Are you male or female?’ based on a ‘male’ answer you can take them straight to question 3 and skip the “Do you like make-up” question. 

To set up branching, in the Survey Settings page, click on the question you want to branch from.

survey10.JPG 

survey11.JPG 

Choose the appropriate choices for the different answers

survey12.JPG 

Advanced Settings

One final group of settings that you may want to make is around who can edit and view the answers once they are inputted.  This can be quite important if you don’t want a user who has responded to be able to see all the other user’s answers.   You may also want to turn off search crawling if you don’t want the answers to appear in search results.

Survey Settings > Advanced Settings

survey13.JPG 

survey14.JPG 

Then you just need to ask your users to fill out the survey.

survey15.JPG 

Each user can only respond once to the survey

survey16.JPG
 

Once they do, you can view the responses. 

Graphically

graphically.JPG 

graphically2.JPG 

Or Show all responses

show all responses.JPG 

viewresponse.JPG 

viewallresponses.JPG
 

You can also export the responses to Excel and set alerts to let you know when you’ve received a new response

exportalerts.JPG  

(back to Site Owner Help)

Versioning

(back to Site Owner Help)

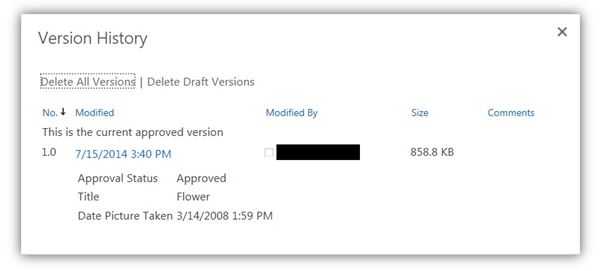
Versioning enables you to store, track, and restore items in a list and files in a library as they are changed. It allows for an administrator to decide whether a new version is created each time the file is edited or not. Versioning is available for list items in all default list types and all file types that can be stored in libraries including Web Part Pages. You can use versioning to record version history, restore a previous version as the current version or view a previous version.

Libraries can track both major versions, such as those to which a new section was added and minor versions, such as those in which a spelling error was corrected. Lists can track only major versions. Lists and libraries can also limit the number of versions that people can store.

Set Versioning Settings

Use the following instructions to set versioning for a Library:

  1. Navigate to the Library you wish to edit.
  2. Under the List tab, select List Settings.
  3. Click Versioning Settings

versioning1.JPG 

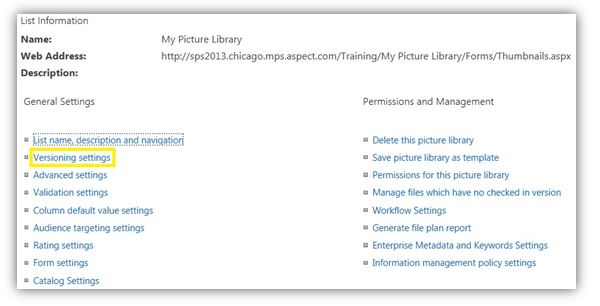
Note:"Require content approval for submitted items": If content approval is not required, there will be no draft items in the library, every new update is published. If content approval is enabled, administrators can choose who can see draft items and can limit it as needed within the "Who can see draft items in this document library?" section.

      4.  Select “No”,if content approval is not required for documents to be published for viewing.
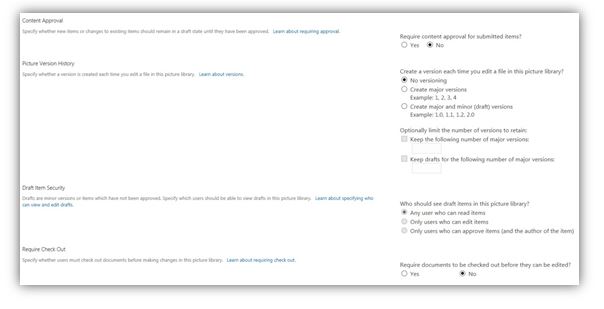
versioning2.JPG      

5.  Select "Yes", if content approval is required for documents to be published for viewing

versioning3.JPG     

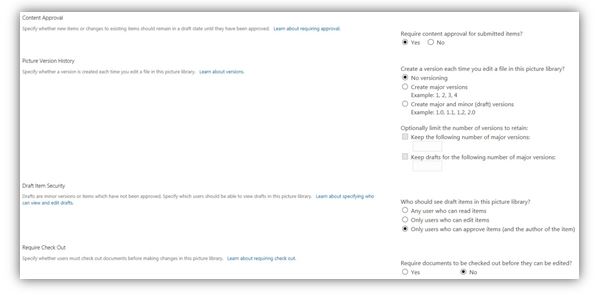
  6.  Major Versioning will store each version as a major version. Major and minor versions will save    drafts and major changes.

NOTE: Enabling major and minor versioning is recommended in the case of publishing or collaborative projects to enable drafting and updates

versioning4.JPG     

7.  The number of versions to retain is based on your corporation’s governance policy.

versioning5.JPG 

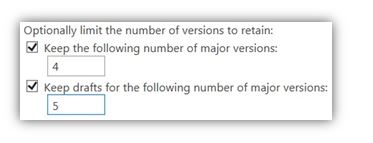
       8.  In the above case, the library will only store 5 draft versions. Once the 6th one is saved, the first one is automatically purged from the system.

      9.  Modify the Check Out option as needed.NOTE: Do not configure your library to require checkout if people plan to co-author documents in the library. People cannot work simultaneously on documents when Require Check Out is in effect.

     10.  Click OK to save changes.

(back to Site Owner Help)

​Syncing

(back to Site User He          (back to Site Owner Help)

You can sync the contents of a document library onto a local folder on your computer and then access your files from File Explorer instead of from a web browser. All updates sync to your local computer and to SharePoint once you're back online.

Click SYNC

sync1.JPG 

Click Allow

sync2.JPG 

It will ask for your credentials

sync3.JPG 

 Click Sync Now

sync4.JPG 

Click Show my files

 sync5.JPG

 So, I can add files here in my local computer and sync them back up to the document library as well. 

sync7.JPG  

(back to Site User Help)          (back to Site Owner Help)


Discussion Boards

(back to Site User Help)                    (back to Site Owner Help)

You can use Discussion Boards to easily communicate with users of your WorkStation.

Adding a discussion question to the Discussion Board

Click + new discussion

 newdiscussion.JPG

Fill in the subject and description of the topic you're discussing and click Save

save.JPG 

If you want to add an attachment to your post.

  • Put your cursor in the Body field. You will see new “Format Text" and “Insert" tabs on the ribbon.

    db-attachment.jpg

  • Click on the Insert tab.
  • Click on Upload File, click on Choose File, and navigate to the file you want to attach.
  • Select the Destination Library where you want this stored. Options are Documents, Images, Pages, or Site Assets.  Documents and Images are probably the ones you will use the most.
  • Click OK.


testdiscussion.JPG 

When you start a discussion you should also set yourself up to receive alerts and maximize the usefulness of this tool.  That way, you can be informed of the discussion and ensure you can respond.

(back to Site User Help)                    (back to Site Owner Help)

Alerts

(back to Site User Help)          (back to Site Owner Help)

Alerts allow users and site owners to create a set of conditions for lists, libraries and web parts that triggers an email notification to users.

To enable Alerts, go to the list, library or web part where you would like the alert applied and click on the List tab on the top ribbon.

alert2.JPG

On the ribbon, you’ll see Alert Me

 alert3.JPG

Click on Set alert on this list

 alert4.JPG

From the next window, specify the properties of the Alert.  You can designate multiple users at once to receive alerts by adding their usernames separated by a semicolon. If you just want to be alerted when changes are made to an item you created, select the option shown in the red box below.​

 alert.jpg

You can see all your alerts by clicking on  Manage my Alerts

 ​

alert6.JPG  

A Site Owner can also ​review and edit alerts for the entire site.
  1. ​Click on the gear in the upper right color strip for your site.
  2. Go to Site Settings.
  3. Click User alerts under Site Administration on the left.
  4. Select the user from the Display alerts for dropdown list.
  5. Click Update.
  6. If you want to delete an alert, click the checkbox in front of the alert, then click Delete Selected Alerts.
  7. Repeat steps 4-7 as needed.

(back to Site User Help)          (back to Site Owner Help)